Showing posts with label decorating. Show all posts

Thursday, November 28, 2013

Happy Thanksgiving!

I can't believe it is already the holiday season! I feel like I have been so busy it has crept up on me! We decided to have Thanksgiving at our new abode this year. I thought it would be a good change of pace for everyone. My grandmother passed away in May very unexpectedly and a few years ago so did my grandfather and uncle. Celebrating in a new environment I thought would be good for everyone. We've only been in our new house for just 2 months so we have been working on lots of preparations. My sister and her gang rolled into town late Tuesday eve and were a great help! 

My niece is so stinking adorable and a master chef in the making! She made a buttermilk pie from scratch!  She even carved pie decorations out of her homemade crust! 


Apparently I forgot to take pictures of the food...but I took plenty pictures of the pies because pie at Thanksgiving is what is most important...aside from family of course. We had a buttermilk pie my niece made, I made a pumpkin cheesecake, my sister made a rustic cherry tart and chocolate Bourbon pecan pie, and my aunt brought the most delicious chocolate pie from the Black Rooster Bakery. Yum.


My mom came over and helped with getting the table decor down.  I wanted a simple rustic theme this year. 


My brother in-law is super handy and made the place card holders out of sassafras. My sweet niece made the place cards!

Hosting Thanksgiving sure was a ton of fun and it was lovely to have my family in my new home. I feel like now they have all been here... and my in-laws have been here too...it feels more lived in and more our own, more like our home. I lived in my other house for 8 years. It was comfortable and familiar. Moving into another place full of uncertainly is quite a transition. But, I am thankful. I am thankful at how fortunate I am to have such great family and friends.

Cheers and Happy Thanksgiving! 


Saturday, November 9, 2013

El Diablo

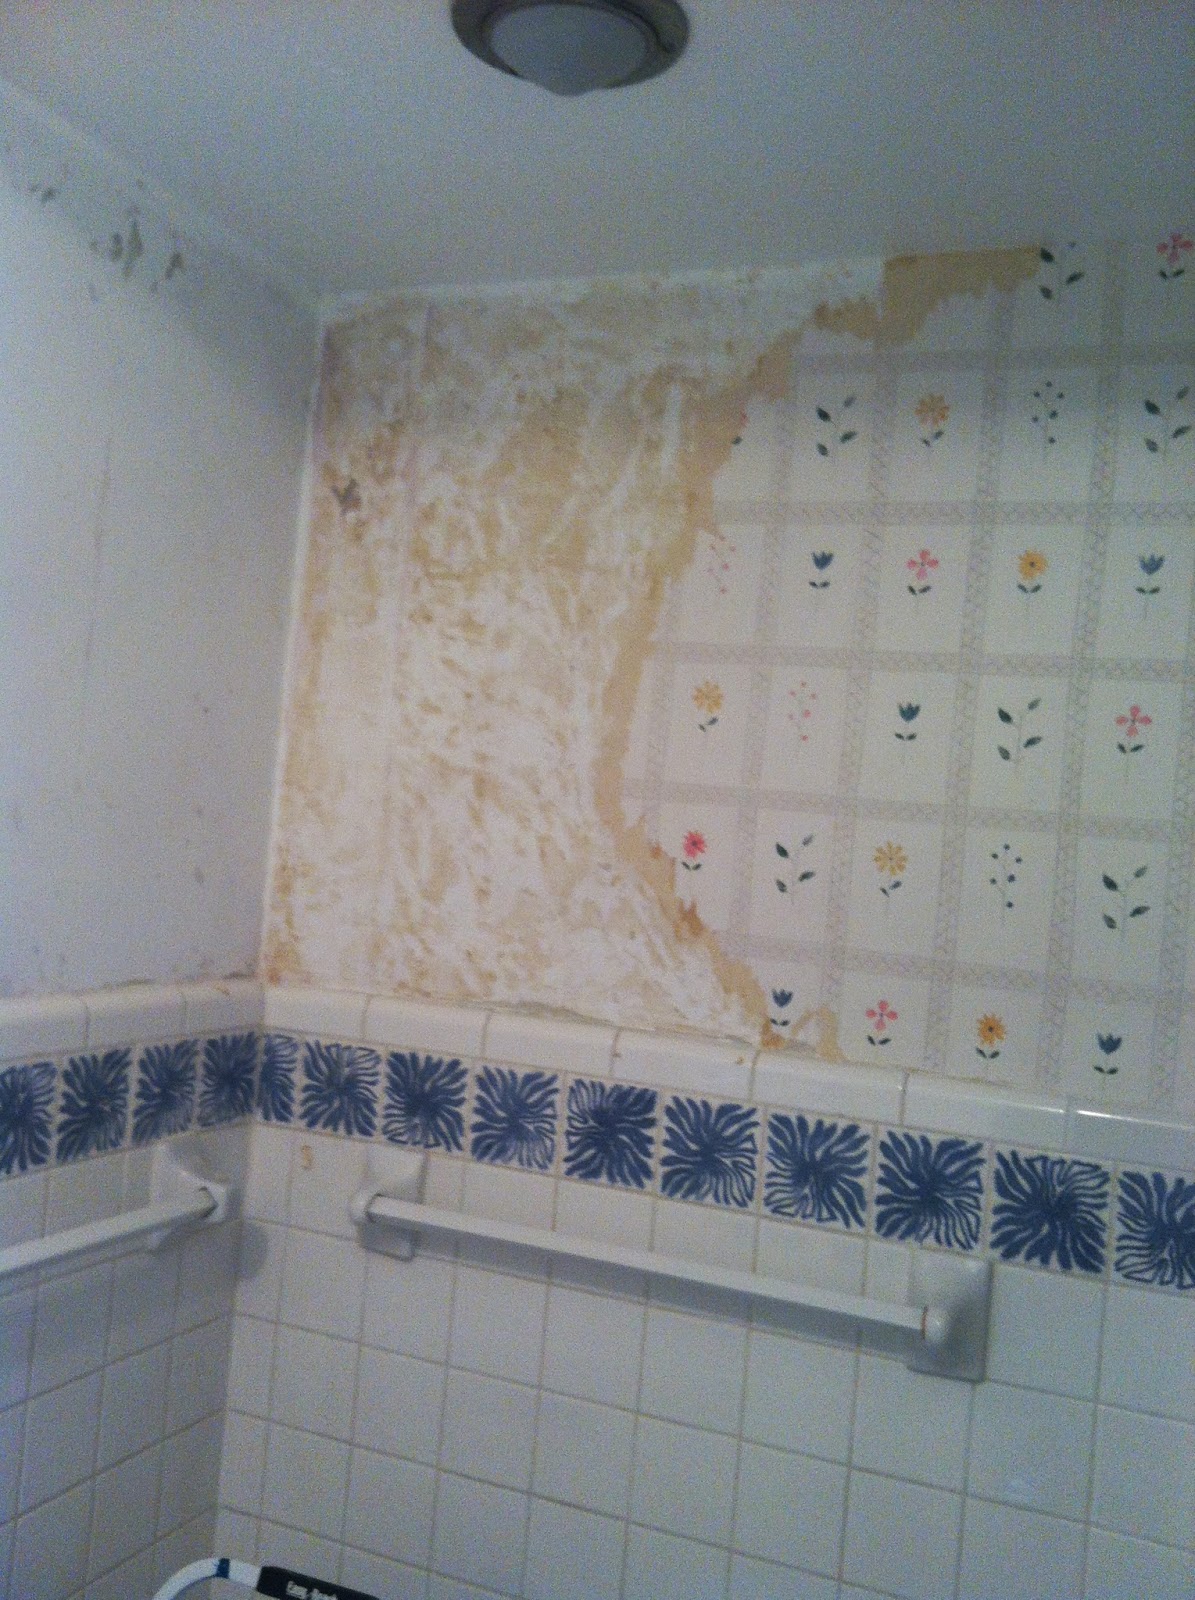
This my friends is the devil!


 Yes, those little dainty flowers. Those little dainty flowers are etched  into the master guest bath wallpaper. Where the flowers are, there is a quilted like texture causing much turmoil for removal and there are hundreds of little dainty flowers all over this wallpaper.

I waltzed myself into the bathroom with my trusty turquoise steamer thinking the wallpaper would come down like the first bathroom. Boy, did I ever have a rude awakening. The first bathroom took about 8 hours total to take all the paper down, the backing, and wash off the glue. 

Here is the bathroom before, in all it's glory.


It's got potential...that is the only saving grace.

Now, for the wallpaper removal, this little tiny bit....took 2 hours.


Since the wallpaper was not only vinyl but  quilted, the paper wouldn't peel off as easily as it did with the first bathroom. It peeled off in little bits and pieces. Every now and again I would shriek with joy when I could peel off an 8 inch section. That happened, maybe 2 or 3 times?

So, after scraping and peeling...


And more scraping and peeling....


And even more scraping and peeling, I finally got the stuff down. Huge sense of relief afterward. It was hard work and my body ached! 

This wallpaper removal project took all day on a Saturday and Sunday and then a few hours after work on a Monday and Tuesday. I did not want to step foot  back in that bathroom...ever. But, during my own personal torture process, I discovered that the walls had no texture. Nuts.

I researched drywall texturing and purchased a drywall texture hopper. Frankly, drywall texturing sucks. I bought what I thought was a good electrical drywall hopper. It was a disaster, more to come on that later.

First, I prepped the walls so the texture wouldn't get all over the place. I have watched enough episodes of Dexter to know how to cover the walls adequately.


I got the hopper all muddied up ready to go.


Then started spraying. At first things were going well. It was making a mess even with the plastic up. Then, it started spewing chunks on the wall. I had been warned this may happen from reading reviews. But some reviews also said it worked great so it was a risk I had to take.

I couldn't just wipe the chunks off the wall because then it would ruin the good texture that had been sprayed on so, I got savvy and started to blot it with a paper towel. It slowed me down a great deal but worked out just fine. Took 6 hours to spray it all on and I think it should have taken less time really. Oh, and I can't forget to mention right when I had only 1/8 of the bathroom left do to the dang thing clogged!! I wanted to throw it up against the wall and jump on top of it and kick it like in Office Space. But, that 1/8 of untextured wall would seriously disrupt my OCD so I took it out back and hosed it off. Put it back together, mixed more texture to put in the hopper and it was still clogged! I managed to do a maneuver or 2 that made some of it spit out and went with that to finish up.

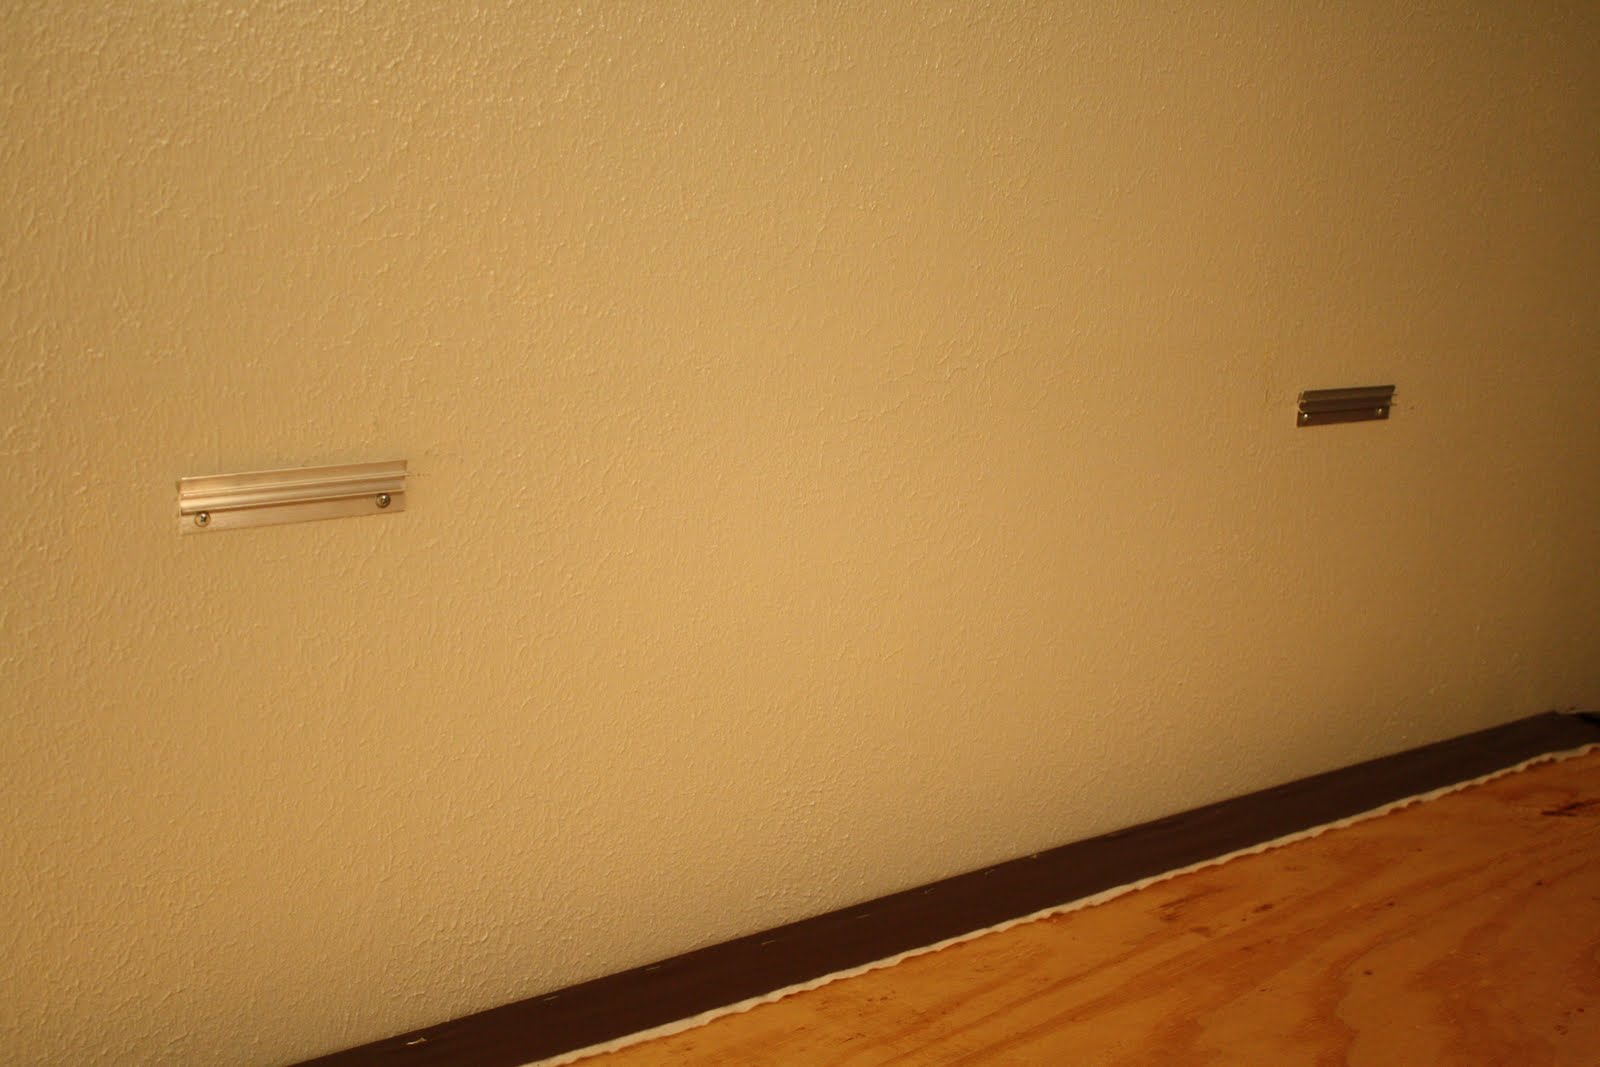
So, here is the final drywall product. Not great but not bad for a first and frustrating attempt!


The 3rd and almost final step was to paint the walls. I didn't like those blue flowerdie tiles at first but they started to grow on me and I like them even more once all those dang flowers came off the wall. 

I wanted a bright blue but not a knock your socks of bright blue. I went with allen + roth Valspar Signature in liberty.

The painting was the easiest part! All this wallpaper tearing, drywall texturing, and painting gave me plenty of time to figure out what kind of "theme" I wanted in this bathroom. I decided to go with a "coastal" theme. I already had a nice set of brown Martha Stewart towels to use so all I needed was accents  and accessories. Between Bed Bath and Beyond and the Home Goods store I got some good loot. There is still a bit more that I need to get to finish things off but I think it is a good start so far.


Eventually I want to update the counter top in this bathroom but since there were no leaks or malfunctions like the other bathroom sink it will have to stay like this for a while. The old homeowner was quite ahead of his time. This is a marble counter top, original to the house when it was built in 1959! Unfortunately, it is a little worn and I haven't figured out how to shine it up a bit. We also just can change the fixtures either. The hole thing is connected together, the sink, fixtures, and the counter was custom fit for the sink and they don't make them that way anymore. 

Mr. Lucas was handy again and installed the new light fixtures. 


Just a suggestion to everyone out there. Hire someone to take your wallpaper down for you, especially if it is vinyl and quilted. No bueno folks!

Cheers!!


Saturday, November 2, 2013

Update On Bathroom Numero Uno

We are getting close to finishing the "face lift" on the hall bathroom. It needs to be in much better shape than it is now because we are hosting Thanksgiving for the first time this year. Can't have my fam traveling in time back to the 1950's (in a bad decor way) every time they use the restroom.

I decided to go with a dark gray for the bathroom walls with green accents. I came across these great succulent wall hangings at Bed Bath and Beyond! My internal bells and whistles were going off when I saw them and they were also on sale, bonus!  


At Target I found the loveliest little fake succulent arrangement and that is when the whole succulent themed bathroom came into play. Why not? I love succulents! 


After searching for the perfect shower curtain for weeks finally Kate Spade spoke to me. A Kate Spate shower curtain...and on sale?? No way!! How the heck can you beat that? Thank you Ms. Spade.


I must say, Mr. Lucas proved to be very handy with this project. He replaced both the light fixture above the bathroom sink and the ceiling light fixture in the bathroom. 


It made all the difference. It is amazing how just the little things can do so much. We are on a budget and a total gut renovation is not feasible but these few things we are doing to give it a face lift have really worked well to perk the place well. 

Now, we wait for counter top and sink installation in a few weeks. Wahoo!

Cheers!


Sunday, October 27, 2013

The Wallpaper Must Go!

Wallpaper. I don't like it. I never really have. I prefer my walls to be left pure. ;) Taking wallpaper down.  I don't like it. I never have and I have never even taken it down before! 

I did some Internet research and watched a few you tube videos so I think that makes me an expert now, right?

The culprit


The weapon


My research findings are that is it much easier to take down wallpaper with a steamer. It is also much easier to take down non-vinyl wallpaper. However, to my dismay, vinyl wallpaper is what I discovered I had.

So with a few choice words after that discovery, I started with steaming the heck out of the walls. When that didn't work, because the steam could not penetrate through the dang vinyl, I began to peel and peel the vinyl paper away. It left the paper backing still on the wall, unfortunately.


Removing wall paper requires beer. 

Once I got all the dang vinyl off the wall I was able to bring out my trusty weapon...the steamer! I steamed the backing and it easily peeled off. I also got a good facial in the process.


Some parts needed a little scraping to get started but once it got started it came off in large pieces, yeeeah!

After I steamed and peeled a million times over it was time to wash the glue off the wall. I used a damp soapy rag...you don't want to saturate the drywall otherwise you may ruin it. I used the rag to wash off all that gunk and soap, it came off pretty easily and then I used a clean dry rag to wipe the walls down. 

Many hours later, clean white wallpaper free walls emerged! 


I am awfully proud of myself if I do say so. Next on my agenda for this bathroom is a fresh coat of paint, a new counter top, and new sink installation! I also need towels and a shower curtain.

Oh...and also on that bathroom update agenda are new light fixtures, did you see that funky fixture a few pics above?? It is just not doing the trick for me.

Cheers!


Sunday, October 20, 2013

IKEA Is The Bomb

A few weekends ago my mother and I took  the treck all the way to Ikea. Yeah, it sounds like a long drive but it isn't really. It was in the past with all the construction but since it has been like 6 years since I have gone all the construction is complete and it only took 1 hour to get there despite all the exits we missed and wrong ways we went!

When we arrived it was like arriving to the ultimate amusement park of furniture and housewares. We got up to the top level so I could hunt down all the furniture I knew I wanted from stalking their website. Then, the lights went off. It was like the Ikea apocolypse. A storm had moved in and was giving their eletricity a run for its money. After a brief wait in the pitch black...the lights came back on and then we went forth and shopped. About 2.5 hours we came to the cafe....we new we needed a break. After hours of writing down item numbers and perusing all the great things that Ikea has to offer, it was time for some Sweedish meatballs and lingonberry juice. Not bad for furniture store food if I do say so myself.

Once we re-powered, lingonberry juice will do that for you, was time to push forth and continue the journey. We continued to write down item numbers and then went downstairs to the market (which can be completely damaging to the pocket book). At the end of our journey, we ended up in the section where you pull all the items listed on your little item number pamphlet. We soon realized that the 2 of us were not going to be able to do to it alone. But alas, Ikea has people that will pull your items for you and deliver it too...for a cost of course but man if you are going there for a truck load of stuff it is well worth it! We got that all squared away and then started our journey back home and then a few days later our Ikea delivery truck arrived!

After countless hours of Mr. Lucas putting everything together (Ikea instructions are horrible!) it is all starting to come together around here.

I tried to go easy on the budget since we have so much to do to the house. So, instead of buying a new coffee table I just updated our old Ikea coffee table with a bit of paint. 

Before:


After:


I used Annie Sloan Chalk Paint. This stuff is awesome!  Annie Sloan is a genious. I wish I came up with this paint and wax system myself! Oh, the boxer is a couch accessory since I have not been able to find coordinating couch pillows I like. ;)


Cheers!

Tuesday, August 16, 2011

How To Make A Headboard For Your Mattress

As a part of my recent bedroom makeover I made a headboard for my mattress. It was super simple and only required a few materials.


First, you will need a piece of wood of proper size for your project. I purchased plywood from Home Depot. They will cut it the size you need for free! You will need foam, but, you could also use an egg crate. This may be more economical because I found that foam can be super expensive. You will save yourself about 20-30 bucks going with the egg crate if you get the non-fancy kind, at least from what I can gather. In addition, you will need scissors, a staple gun, hardware to mount the headboard to the wall such as a French cleat, and fabric (I used brown faux leather). 


Lay down your fabric, then the foam, then the board.


Trim a bit of the fabric off, however, leave enough to pull over and staple to the back of the wood.


Staple the fabric to the wood.


Then mount your hardware to your headboard (and wall) and hang.


There you have it.


Just a few suggestions. If you use an egg crate I would wrap 2 layers of fabric around so the headboard does not look bumpy. You could take cheap fabric for the first layer and then add your nice fabric as the last layer. Also, you can change this up as much as you want. Decide to change your bed linens? No problem. Just go buy some new fabric to change your headboard up too! 


Cheers!


Sunday, December 7, 2008

Tis' The Season

I have had quite a productive weekend! Most importantly, I got some Christmas shopping done! I do not feel quite as stressed. I am hoping to have everything finished up by next weekend. It seems that people get so stressed out around the Holidays and it just should not be that way so, I am determined not to be running around like crazy the day before Christmas Eve.


While I was out shopping, I could not resist my favorite chocolate candy....OH, how I could not resist it. To me, there is nothing better than chocolate and hazelnuts.


This weekend I also finished decorating the house. My parents got me luminarias while they were in Santa Fe. I love them!


I was able to get all of the inside decorating done too! It is awful cheerful around here! Jeff is kind of a bah humbug, the thinks Christmas is a "Hallmark Holiday", but how can he think that when the house is all decked out? Ha! I think he really truly does like the holidays, he just acts like he does not. :-)


I also made some more ornaments for the tree


I finished up the Christmas tree sugar cookie ornaments.


While I was looking through Etsy, I came across the cutest pine cone ornaments with felt balls on them. I just had to have one for myself. I had pine cones and I also had some roving so I went to town!


I finished up some of the felt play food that I have been making for Violet.

Some Ravioli, too cute!


And... a little fettuccine


Now, I need to make some meatballs to finish it off!


Cheers!
Related Posts Plugin for WordPress, Blogger...